|
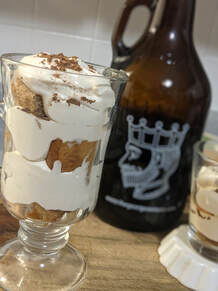
You know I don't celebrate every food related holiday, but when I do - there's typically a beverage included! LoL! To celebrate International Beer Day, I wanted to take a quick few minutes and share a recipe that I use time & time again to inspired & impress; my Chocolate & Espresso Stout Beeramisú. In fact, I'm even making this tomorrow night for a LIVE Workshop I'm hosting for a Bachelorette Party! 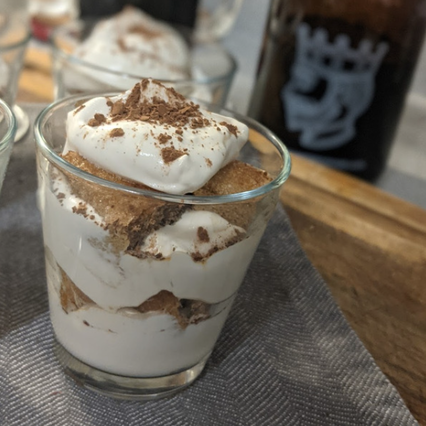 This recipe, while not tradition for a few reasons, allows for an easy spin on the layered italian-style dessert of Tiramisu! It features pre-made Lady Finger cookies that are dipped in chocolate & coffee stout and layered between a rich creamy mascarpone filled layers. For this, I like to use a really heavy double chocolate stout (the one pictured here was from my friends at "The George Brewery & Pub" based out of Newmarket, Ontario) but you can use a either a double chocolate stout and add your own espresso/instant espresso powder OR really any oat or milk stout and then flavour it with both cocoa powder and espresso/instant espresso powder. (If you need help, please feel free to reach out to me at anytime with questions!) And, for the cream layer - I've removed the work of having to whip raw eggs into stiff peaks, and replaced it with a lovely semi-sweet whipped cream, mascarpone cheese and just a hint of the zing from a lemon to keep this rich dessert lovely, light and perfect to end any style of meal!
And, while I'm doing this recipe LIVE tomorrow - this is a great addition to any Virtual Workshop! So if you run a brewery, or just happen to love a good stout - reach out to me today to see how we can work together to feature the drink that you love in a really new and refreshing way!
Cheers, and Happy International Beer Day, All!
1 Comment
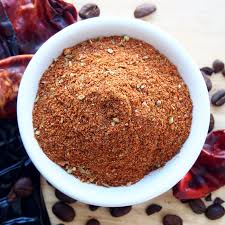
We know he’s likely spending the entire weekend outside by the grill anyway, so why not give Dad a break this Father’s Day with some delicious and easy recipes that are sure to keep even the hungriest father-figure full. Remember, the Dads in our lives like to get spoiled and treated, too. Let’s do just that with some straight-forward and easy-to-execute dishes, rubs and tasty treats you can use all year-round.
~Savour Your Experience~
Cheers, Gillian
Directions:
OBC NOTE:
Combine equal parts sugar & water, about ½ cup each is perfect, and then either bring to a gentle boil over medium heat on the stove, or microwave on high for about 2 minutes, just until the sugar is melted and the liquid remains clear. Set aside to cool and chill until we’re ready to use! 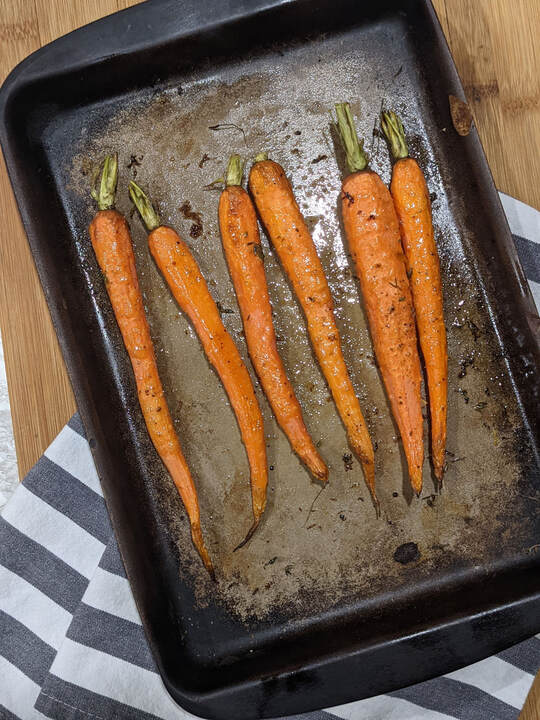
Did you know you can grill carrots?
It was news to me my friends, but boy am I glad I tried it! This new method has been a favourite of mine every since learning from my Future In-laws that that is how they always do it! It makes perfect sense because Carrots contain both water - which helps create steam, and sugar - which helps create the most amazing caramelization ever! But, whether you're using any oven or a grill, these Lemon & Thyme Carrots make a fantastic side dish that's super simple and fairly approachable in price for a weeknight meal or family gathering. Check out the video I made for ChefTorial which takes you through a few simple steps on how to perfectly prepare these beauties!
And for one last "DYK" or OBC Tip - roasted carrots also make really, really good "Vegan Hot Dogs" They fit on a bun beautifully and are easy to season up with more of a BBQ or even Cajun feel and then lend themselves very nicely to a few fav condiments!
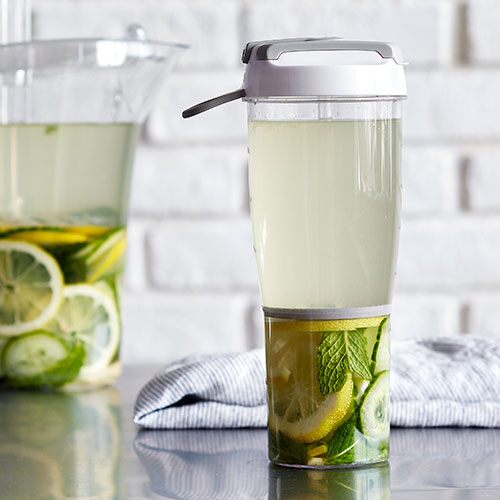
Enjoy! Welcome to the wonderful world of - Water! Staying hydrated can almost feel like a task at times, but when you combine some citrus and fresh herbs into your cup, it gives you something to get excited about! Check out a few simple recipes for some great flavour combinations below that are suggested to infuse about 20 - 30 oz of water at a time.
Make it a Spritz! |


Rosemary Grapefruit Water
|  |
 | Strawberry Lime
|
Recipe & Image Credit: As One Blonde Chef I believe in using some of the best tools & recipes available, that's why I'm proudly an Independent Consultant with Pampered Chef Canada. Kudos to them for these awesome recipes & images!
Chickpeas are such a versatile ingredient to use in your house! You can use them whole in things salads, soups, chili or even your curries - or you can grind them up for recipes like falafel or hummus.
They have a gorgeous buttery texture, and one of my favorite ways to enjoy them (which I've shared with you here) is seasoned and roasted so they're nice and crispy and make an incredible snack.
They have a gorgeous buttery texture, and one of my favorite ways to enjoy them (which I've shared with you here) is seasoned and roasted so they're nice and crispy and make an incredible snack.
Roasted Chickpeas
You'll need:
To make:
|
Homemade Hummus
You'll need:
To make:
|
Chickpea Salad
You'll need:
To make:
|
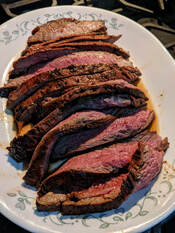
| Ever since my family travelled to Northern Ireland together to see where my Mum grew up in July 2016, we've gotten together to celebrate for July 12 and to reminisce about our trip. This past year, we had an outdoor BBQ, and my Mum contacted her cousin Stephen - who's also a Chef & Foodie, to ask for some British-Inspired or Irish-Inspiration for some delicious wings. Well, this recipe right here is the result of his recommendation and whether you're using the low-sodium bottled teriyaki sauce or you make your own, this combo is SO super delicious on everything from Wings to flank-steak. | 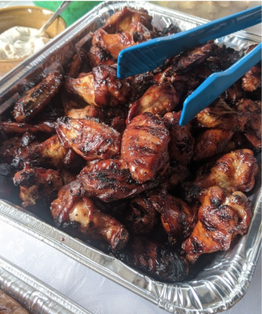 |
This marinade only gets better with time, so plan for a long marinade on this one
- 24 to 48 hours is kind of the sweet spot!
Ingredients:
- 2 - 3 lbs chicken wings (in whatever cut you prefer! We like them flats and drummy’s separated)
- 1 small bottle low-sodium teriyaki sauce
- 1 can guinness
- 4-5 cloves garlic, smashed
To Marinate:
- Combine all ingredients in a large Freezer Bag and mix well.
- Add in Chicken Wings. Let marinate for a minimum of 60-minutes.
If you're making ahead, let marinate for 60-minutes and then freeze until you're ready to use them. 1 day before, bring them out of the freezer, defrost partially and then return to fridge to defrost completely.
To Cook:
You can cook these on the grill or in the oven! The idea is low & slow! In the oven, we do them at 325°F for 60-75 minutes until they’re nice and dry and crispy (yet still incredibly moist on the inside)
OBC TIP: Sometimes I find when doing them in the oven, I’ll broil them for the last 1 - 2 minutes to add just a little bit of char!
Dress it up with toppings!
Try toasted sesame seeds, chopped green onion, or chopped cilantro
to add colour & flavour to this delicious dish.
A big thanks to our Cousin Stephen and his girls for not only hosting us like an absolutely Gem back in 2016, but for the inspiration for this recipe as well. Something tells me it will be in our books for a long time to come!

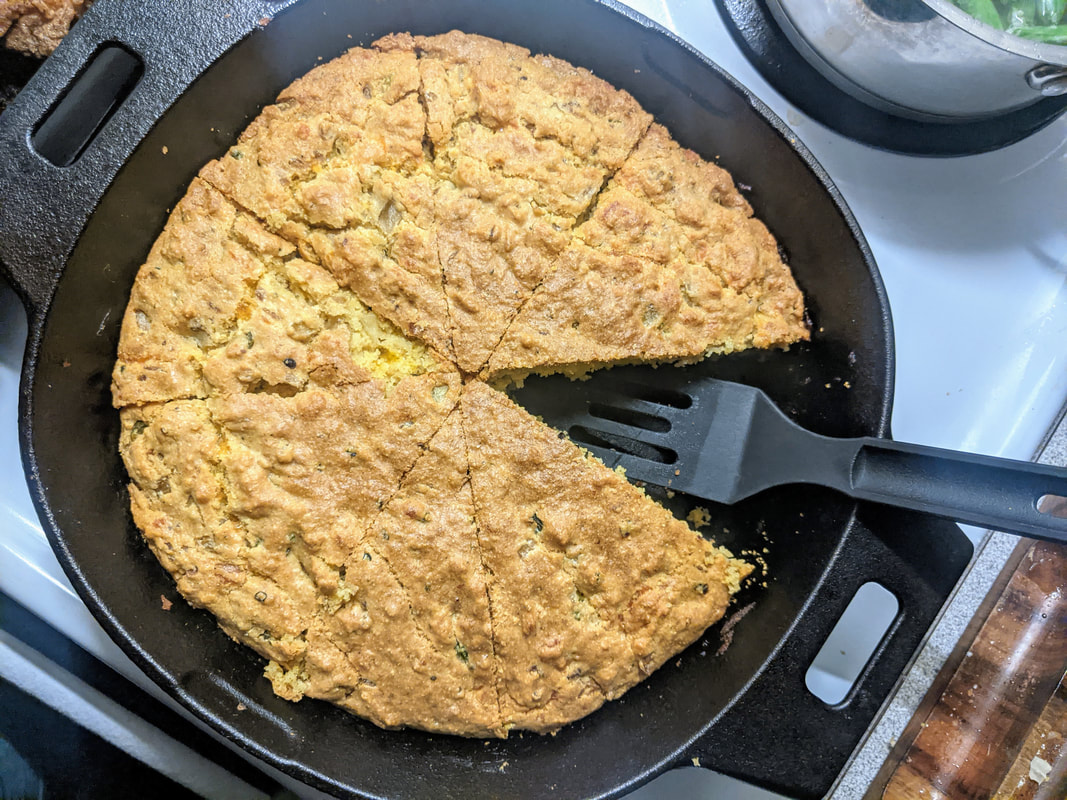
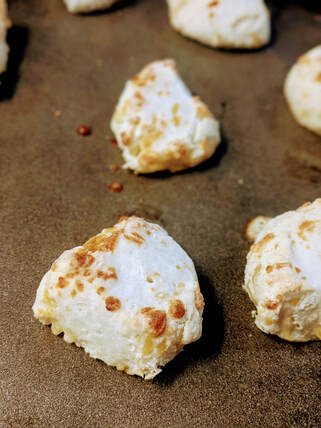
Week 2 of our Winter Workshops was a lunchtime session where we made a healthy carrot and ginger soup, Greek salad-in-a-jar and a tangy lemon-dijon vinaigrette! And, the lunch was topped off perfectly with these super delicious 3-Ingredient Biscuits!
I found these while experimenting & getting to know my Pampered Chef Deluxe Cooking Blender and these were listed alongside of a Broccoli & Cheddar Soup (which is also lovely) - but now, I think these little babies will be a must-have alongside any soup recipe!
|
INGREDIENTS:
DIRECTIONS: Preheat the oven to 400°F
|
3 Ingredients + 3 Simple Steps = 1 HUGE meal-time win!
| And remember, as much as these are called 3-ingredient biscuits, my goal is to make sure these recipes fit your tastes! So feel free to add in some other spices or seasonings! The guests on our workshop thought of different combinations such as:
And, once they were made my partner-in-crime suggested that we try these and turn them into breakfast sammy's and I happen to think that's one heck of a great idea! | 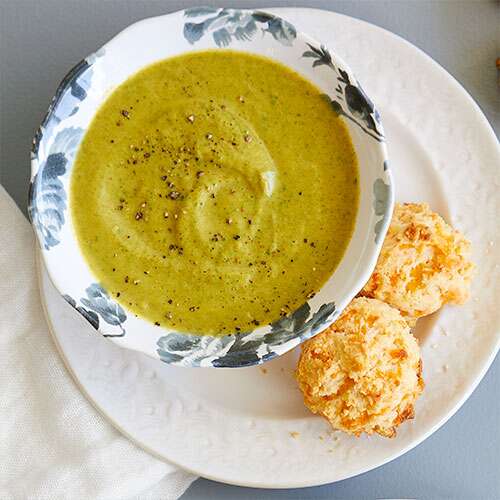 |
Enjoy, and always remember to Savour Your Experience!
Cheers, Gillian
Cheers, Gillian
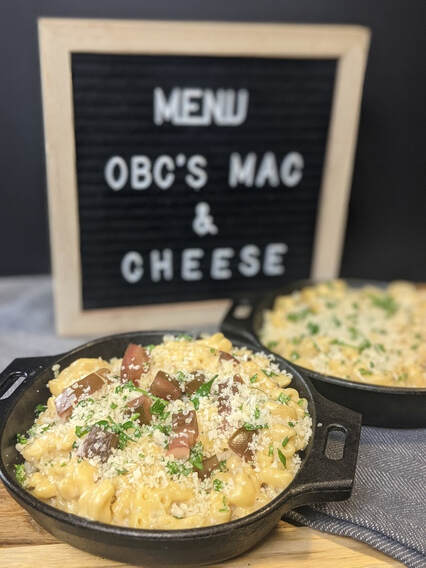 | On Sunday, January 10 I threw myself a birthday party - but not just any birthday Party - |
So, let's get cooking!
INGREDIENTS
|
For the Pasta:
|
For the Sauce:
|
For the Toppings:
|
DIRECTIONS
- Combine water & salt and get your water boiling! When your water is boiling, add in your pasta and cook for the recommended cooking time, until perfectly al dente!
- Next, get your sauce ingredients measured and ready, including, grating all of that cheese!
- Once your pasta is cooked, remove 1 cup of pasta water and set aside. Then, drain your pasta in a strainer. While your pasta is in the strainer, drizzle with olive oil & garlic. Toss, and set aside.
- In the same pan, over medium heat, add in butter, garlic & flour. Whisk to combine for about 90 seconds. Then, start adding in your milk (½ cup at a time) until you reach about 2 cups of milk. Allow your sauce to have a few minutes to bubble and combine to the perfect consistency.
- Add in ½ cup of the pasta water, dijon mustard and any seasonings. Whisk to combine.
- Add cheese and stir until combined. Remove from heat, and add in your pasta. Toss all the pasta in the sauce, and set aside!
- Now, turn on your oven to preheat to 375°F.
- Finally, create your topping by combining all of the ingredients in a small bowl.
- Portion out your Mac & Cheese mixture into your baking dish(es) & top with your panko mixture!
- Bake for about 25-minutes until warmed through the middle, and slightly crunchy on top!
OBC TIP: Save the topping until you’re ready to bake! This topping can stay in the fridge or freezer until you’re ready to use! Baking from the fridge, you’ll likely need closer to 45 minutes, and if you’re cooking from frozen it will likely take close to 1.5 hours! From frozen, you’ll want to cook covered in foil for the first hour, add the topping and then finish baking uncovered for about 30 minutes!
Now, make It Your Own!
As mentioned, this is a basic recipe that allows you to get the technique of the Roux and the Mac & Cheese itself. Then, you can take this and make it your own with different short pasta shapes, add-ins, toppings and of course by selecting and combining different cheeses!
Your Feedback is Welcomed!
| For those of you that did join us live - if you could take a few minutes to provide any feedback about the overall experience - right from the Get Ready Guide, to the Virtual Experience and this Post Experience Recipe Book, I'd really appreciate it! Please click here to provide some feedback: https://forms.gle/GSPrVfhyNS1tvPfQ9 Thank you so much for a great party and such a positive start to 2021! You guys are the best! Cheers, Gillian |  |
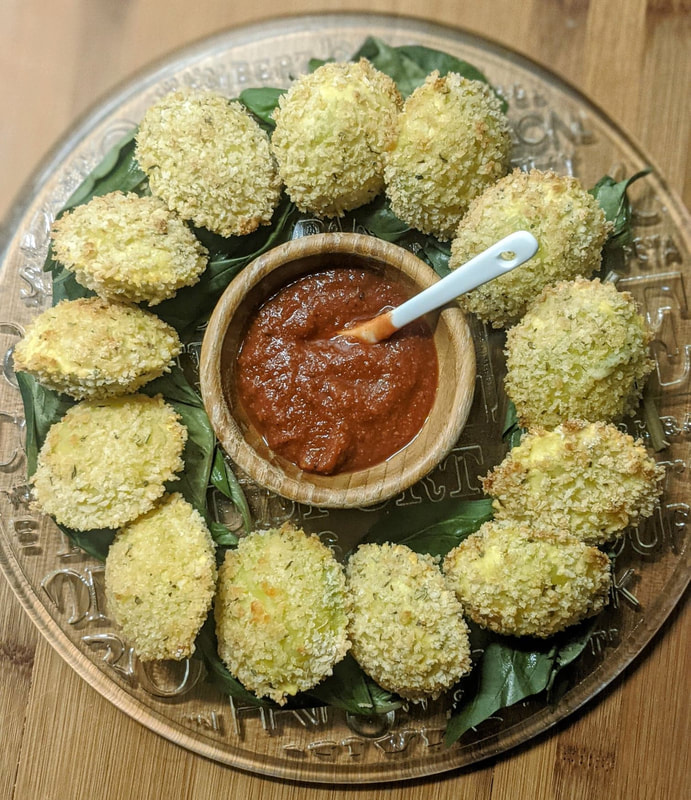
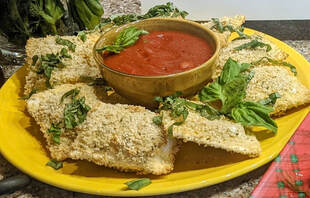
This is such a yummy take on serving pasta and it makes a really festive appy!
First, choose your favourite flavour of fresh store-bought ravioli. Next, add a simple panko crust, and finish it all off with a homemade (or store-bought) marinara dipping sauce for a great crunchy bite!
Then, decorate! I made a wreath, but you could really make any festive shape you wish!
First, choose your favourite flavour of fresh store-bought ravioli. Next, add a simple panko crust, and finish it all off with a homemade (or store-bought) marinara dipping sauce for a great crunchy bite!
Then, decorate! I made a wreath, but you could really make any festive shape you wish!
Ingredients & Tools
|
For the ravioli:
For the sauce:
|
Tools to have ready:
|
Directions
For the ravioli:
1. Boil the ravioli on high, in small batches for 2 - 3 minutes per piece or until the pasta just starts to puff up and float to the top of the pot. Remove and place in a single layer on a cookie sheet lined with a paper towel to drain and let cool slightly.
2. Prepare your breading station in 3 medium shallow bowls.
- Bowl 1: ½ cup All-purpose Flour + 1 tsp italian seasoning + salt & pepper to taste.
- Bowl 2: 3 large eggs, that have been gently whisked together
- Bowl 3: Panko Bread Crumbs + 1 tsp italian seasoning + salt & pepper to taste
Do you know the best month to bread in? |
|
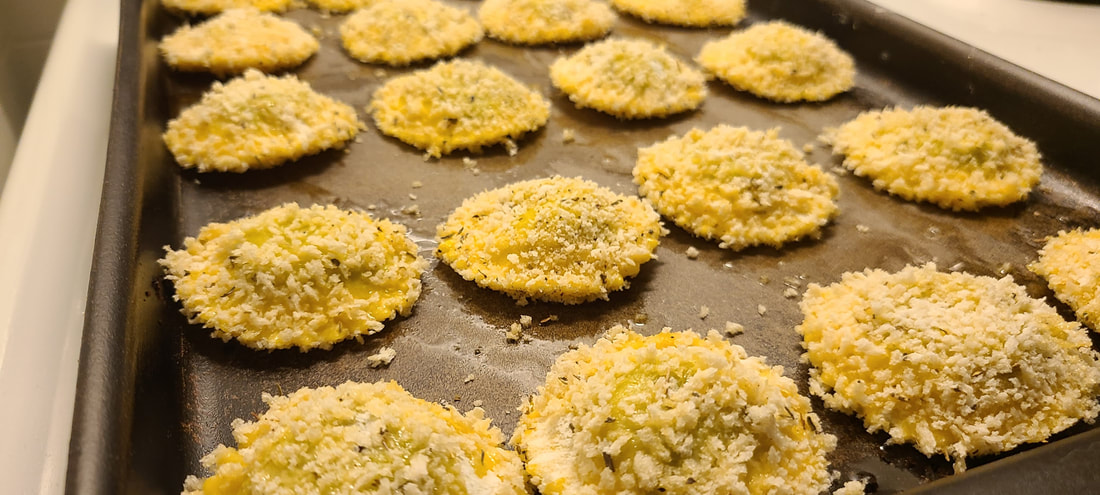
3. To bread, carefully take each piece of Ravioli and dip it into the flour, then into the egg, and then finally into the bread crumbs. Place on a single layer on a Stone or a metal pan covered with Parchment Paper. Repeat for each Ravioli.
4. Bake at 375°F until golden brown.
4. Bake at 375°F until golden brown.
For the sauce:
In a small saucepan, over medium heat, combine olive oil, garlic and (optional) chili flakes. Sizzle until you can just smell the garlic. Add 1 cup of Longos Organics Passata Sauce. Stir in italian seasoning and then turn down the heat to medium low, and simmer while the pasta is cooking.
In a small saucepan, over medium heat, combine olive oil, garlic and (optional) chili flakes. Sizzle until you can just smell the garlic. Add 1 cup of Longos Organics Passata Sauce. Stir in italian seasoning and then turn down the heat to medium low, and simmer while the pasta is cooking.
Then, serve it up!

